2005 2.8 CRD cambelt change
#1
 11-14-2013, 05:40 AM


Ok well after 3 months and 5000 miles I suppose my cambelt change must be successfull, so I thought I would share the experience.
Dealer changed belt at 70000 miles, I assume they did the idlers and not the tensioner. Initially they couldn’t make their mind up if it should be changed at 60k or 100k, they then decided it was 60k and changed it.
At 207000 miles I thought I really must do it!
Method
I opted to go down the locking pin route and bought the pins.
I put the vehicle on ramps
Remove:
1. Undertray
2. Wiper arms and wiper tray.
3. Starter motor
4. Air box filter and Maf sensor.
5. Right hand side engine mount (engine supported on trolley jack).
6. power steering belt, serpentine belt and tensioner.
7. Harmonic pulley, 4 bolts (I marked the pulley so it went back same place)
8. Timing belt cover (you need 7mm spanner for this, not enough space for Ľ” drive socket)
9. The yellow plastic plug that covers the flywheel locking pin hole, the two alan key bolts that cover the timing pin holes foor the camshafts.
10. The timing chest cover.
Timing pins:
Turn the crank so the notch on the end of the crank is 90 deg ATDC. You can just see the hole in the flywheel that the crankpin should go in, its now worth checking that the inlet (and/or exhaust) timing pin can be inserted, if not turn the crankshaft one more revolution. All 3 pins should go in, they are a bit fiddly (esp Crank and exhaust pins) but you dont have to force them.
Just a note on the HP fuel pump timing there is a mark on the pulley that can match up with a mark on the timing chest at about 10 O’clock. Since the camshaft pulleys rotate at ˝ engine speed and the fuel pump at 1/6 engine speed you might have to turn the engine 4 more revolutions to get the pump marks to line up. I’ve read that there is no need to time the fuel pump on a CRD, but I did just to be sure and lining the marks up saves painting your own marks on the pulley timing chest.
I changed the 2 idler pulleys (left hand thread) and the tensioner.
Now for the hard bit, getting the new belt on! Worth watching this Youtube video
I couldn’t get the belt tight enough at the front of the engine, needed on more tooth, what you have to do is remove the flywheel locking pin and rotate the engine anticlockwise by one tooth, hold the belt on the crankshaft pulley and rotate it back clockwise and put the flywheel pin back in (quick!). This gives enough slack to slide the belt over the tensioner.
This really went against the grain with me, taking a timing pin out just doesn’t seem right. I know the pistons are ˝ way down the bores,the cams are still locked and cant move but still seems wrong.
I think if I did this again I would get a camshaft holding tool and slacken off the inlet/exhaust camshaft/pulley bolts (taper fit) so that they could rotate and give the slack to get the belt on.
Setting the tensioner without the little 2 pronged tool that came with the timing pin kit would be a bit fiddly.
I turned the engine over 6 revolutions by hand, made sure all the 3 pins go in easily (and the fuel pump marks lined up) and then put it back together.
The new belt has made the engine smoother at idle, if I watch the fuel filter from underneath it moves by about a third of what it used to do.
Problems encountered/things I found:
1. You can remove and reinstall the power steering belt by hand, rotate the engine and pull sideways.
2. My harmonic crankshaft pulley wouldn’t come off by tapping with rubber mallet, came off easily with the right puller.
3. The 2 vertical engine mount bolts (that go into the chassis rail) were both quite stiff, I think its paint in the threads, I ran a tap through to clean the threads out.
4. I couldn’t find the torque settings for the engine mount bolts (into the chassis rail and engine block) I would appreciate it if anyone could tell me what they should be.
5. I used a piece of cord tied to spanner to hold the serpentine belt tensioner (tie the other end of the cord to something on the bulkhead) that way you have 2 hands to thread the belt and then release the tension.
6. There was a slight dusting of what looked like aluminium dust, mostly around the tensioner. The tensioner was in the slack position, but with the clamp bolt tight! It looks like the Chrysler dealer who did the last belt change didn’t set the tensioner, consequently the spring had rubbed against the tensioner body and fretted its way into the body by about 2-3 mm. I don’t think there was too much chance of it jumping a tooth...it had done 137,000 miles...but it makes you think. I can put photos up of the tensioner and belt if anyone is interested.
#2
11-14-2013, 07:03 AM
An Absolutely fantastic post mate. I want to do mine on a 2.8L but not sure if I should do it! Mine has done 84k now! But no idea if the belts have been done. Where a outs are you situated? I'd be more than happy to pay you to do the job for me! But of course I'd be getting me hands in there myself to help.
Great thread
Great thread
#3
11-14-2013, 10:39 AM

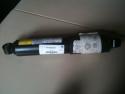
For anyone interested. I took a few photos when doing my belt change a few months ago.
http://s13.postimg.org/y7l8sq5jr/01_before.jpg
http://s10.postimg.org/txiir3zex/04_pump.jpg
http://s24.postimg.org/g4vp81y2t/05_support.jpg
http://s8.postimg.org/xayj1a03p/06_clamped.jpg
http://s10.postimg.org/oh4gagvex/07_new_belt.jpg
http://s12.postimg.org/78p8ktwf1/09_pin.jpg
http://s16.postimg.org/6p6yoclw5/10_crank_after.jpg

#6
11-14-2013, 03:48 PM

Well done Rodger and Travelmad, just the things I love to see on this site.
The last time I did a Belt Kit change, wasn't my Voyager but a Renault inline Diesel.
I cheated sorry to say, like Travelmad I locked flywheel and marked cam wheels, pump and crankshaft in the TDC position.
No cam pins though, but what I did was mark the old belt adjacent to wheel marks and transferred these markings to new belt. Hence the new belt went back on the same position as old belt.
The only obstacle I had was the pump had moved slightly due to inside pressures but I managed to turn it back.
So if you want to do the job mark it like I did and you won't get lost if a movement occurs.
I didn't do my Voyager cam belt kit this year as I couldn't have did it as quick as the garage and would have been an outside job for an old Git like me.
#7
11-15-2013, 06:59 AM
Photo's always help. The service manual diagrams are sometimes misleading.
I didn’t have the timing tools. I made sure there were plenty of alignment marks, locked the cams as shown and used a modified drill bit as a locking pin!
I made the change at 73,000miles. Replaced the timing belt, tensioner, idler pulleys, aux belt and power steering belt. The old belts had small cracks and no doubt would of lasted longer but better to be safe than sorry.
I have done 6,000 miles since. :-)
Last edited by travelmad; 11-15-2013 at 07:01 AM. Reason: spelling!
#8
04-23-2014, 01:45 PM

I have just changed my cam belt using this great advice from Rodger, this is a great thread and I wanted to add value to it.
1) Why remove the wiper mechanism? Because you won't get to put the exhaust locking pin in with the mechanism still there. Take a look at the rear and sides of the under tray for the wiper mechanism, it's only 4 bolts round the back, 2 just by the windscreen and unplug it.
2) Where do the locking pins go? I would have guessed they went into the cam pulleys at the front of the engine but no! The exhaust one is right at the back left of the camshaft cover, the inlet is also in the camshaft cover behind the alternator (so that has to come off) and the third is behind the starter for the crank.
3) Do you change the water pump? Good idea but you have to remove the rear cam belt cover which means the pulleys come off too. I didn't fancy that without a tool to hold them.
4) Getting the starter motor out. If you haven't done this expect the worst. I think it took me more than an hour. The last fixing is a stud with TWO nuts on it. The first holds the earth wire to the block, the second fixes the motor. Having finally found the first (about 4 hoses disconnected) I expected the motor to come out!
5) Getting the exhaust locking pin out. There isn't much room at all and getting a 5mm allan key in was a problem because there is not much space. In the end I chopped about 5mm off the end of an older allan key so it had clearance.
Hope these comments help someone.
Vince.
#10
07-10-2016, 04:01 PM

Sorry to drag up this old thread but just wanted to express my appreciation for the contributors. I just changed the cambelt, idlers, tensioners, and water pump over the weekend and the information herein was invaluable, and very accurate.
I also used the pins but after having had a good look at the belt and pulley arrangement with the cover off, decided not to take the starter motor off. With some good marking on the crank pulley flange and the locking pins in the camshaft, I felt confident that it should be straightforward even without the crank locking pin.
It's definitely a time consuming job especially with the water pump change. Not much to add to the above recommendations, although I failed getting a new power steering pump belt on. There just wasn't enough stretch in the new belt and so I put the old one back on as it didn't look too bad.
Also, since the cam pulleys aren't keyed, getting the new belt on with the pulleys loose was a doddle and getting the crank and fuel pump aligned. Must admit this is the first engine I've come across that didn't have keyed cam pulleys or at least on a taper.
In addition, I also needed to change the A/C compressor and did the fuel filter and oil and filter at the same time.