
Time to replace the rear evaporator, any tips?
#1
 07-12-2011, 04:26 PM


I have a Grand voyager -02 3.3 with leaking rear AC.
Did put some dye in the AC and noticed, with and without UV light, a leak over the rear sealingplate.
Is it only the evaporater that can cause this leak or is there any o-rings or gasket etc. that can leak in the rear end chassi?
Is this a job for a average homemechanic like me ,if so, any tips from someone that have done this work.
I do have the manual,but no special tools.
It is a lot of steps just to remove the evaporator
Did put some dye in the AC and noticed, with and without UV light, a leak over the rear sealingplate.
Is it only the evaporater that can cause this leak or is there any o-rings or gasket etc. that can leak in the rear end chassi?
Is this a job for a average homemechanic like me
,if so, any tips from someone that have done this work.I do have the manual,but no special tools.
It is a lot of steps just to remove the evaporator
#2
07-12-2011, 05:15 PM

It is a lot of steps just to remove the evaporator
There are Two warnings I will give you.....Separating the plate from the under car lines will undoubtedly lead to some bruised Knuckles, and Much foul Language.... But they must come apart. The second, is removing the heater core from the rear box. The quick connects are usually brittle, and removing them makes them Crumble....I dont Drain the coolant, or remove the hoses....There are either 4 screws, holding the core into the box, or 4 lock tabs, which get pryed out of the way, And slip the core out of the box...and lay it aside with the hoses attatched....
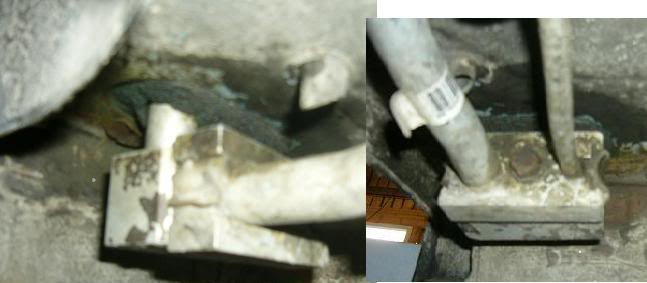
From the picture you have the early style design.....So its possible that your evaporator is intact. The new design has the expansion valve bolted directly to the evaporator, But yours has "EXTENSION TUBES" between the evaporator and valve....When you remove the heater box from the vehicle and dissassemble it...Look at where the DYE is....If it is below the expansion valve, and there are no traces of dye on the evap fins...your evaporator is probably fine.
Now the rough part.......You are opening a Major Component of the system, which will require the system to be evacuated, and Recharged......
I would never discourage anyone from doing their own work, But A/C can be very dangerous without the proper equipment and Knowledge......Home charging Kits ARE NOT THE PROPER EQUIPMENT, and the instruction booklet in the kit...Is Far from Adequate Knowledge of A/C systems......The money you will save...In NO WAY will Buy Back your EYESIGHT if something were to go wrong.
#4
08-02-2011, 05:16 AM
Just a little update.
Finally removed the rear evaporator and it was much easier than i thooght. Except for the sealing plate, as djinn posted earlier, it was much foul language before i could remove it.
The evaporator seems to be fine and the leak is on the extensions tubes, see picture of the green dye.
[IMG]https://www.chryslerforum.com/forum/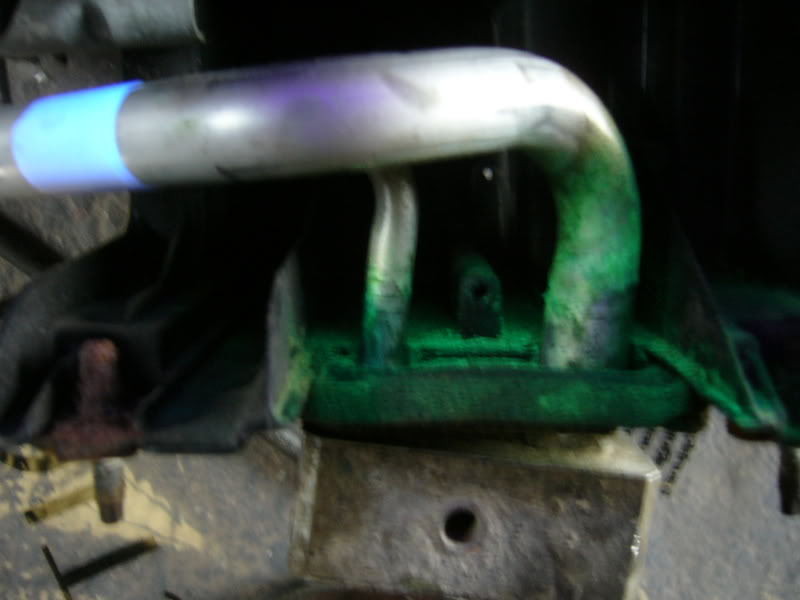

Thread
Thread Starter
Forum
Replies
Last Post
latreto
Chrysler Voyager & Town & Country
18
02-25-2017 10:11 AM
motley1987
Chrysler 200 & Sebring
1
05-25-2013 08:54 PM
jeffduck
Chrysler 200 & Sebring
14
08-20-2011 11:37 PM