
Timing belt how to for 3.5 Pacifica


Thread Starter
|
Member
Joined: Aug 2011
Posts: 46
I did my wife's timing belt and water pump yesterday. Pretty easy straight forward install. I see a lot of people asking about it so i figure while it's still fresh in my head I jot down a quick how to procedure.
Step one, disconnect the battery
2) take the plastic 3.5 lid off of the engine
3) take a screw driver and loosen the hose clamp by the throttle body, disconnect the sensor on the air intake rubber hose, and take a 10mm socket and loosen the bolt on the rad support that holds the air filter canister. Once that is done, wiggle the entire air intake system off of the car.
4) jack up the car, support the car with a proper jack stand on the sub frame behind the wheel so you can get under the car later. Remove the plastic inner fender near the front of the wheel well that covers the Ac compressor. There are 2 plugs in the wheel wel, one on the lower frame under the rad, and two are in the inside frame of the engine compartment.
5) drain the rad. I took off the lower rad hose because I was replacing it anyway.
6) Now that the car is in the air, get a floor jack with something solid and flat to support the oil pan
7 ) With a 15mm socket, take off the 3 bolts on the motor mount that's attached to the motor, then the 2 15mm bolts for the mount that is on the frame of the car.
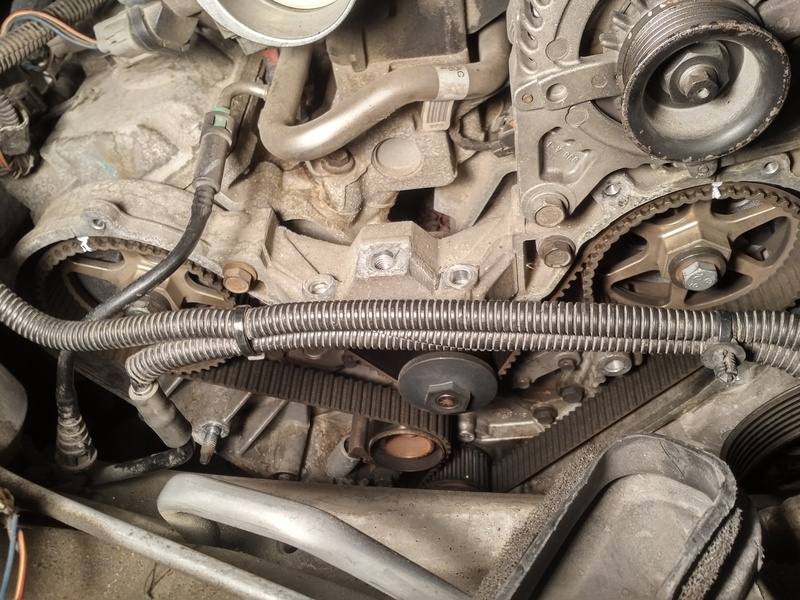
8) Take off the serpentine belt by putting a 3/8 drive into the tensioner and pull it back and remove the belt. Time to take the bolts off of the timing cover. Which I first took off all the 10mm bolts that I could see (2 at the top, 2 at the rear side near the fire wall), then with a 1/2" socket, remove the 2 at the top of the cover. Take a picture of the pullies on the engine so you know how they go back on. Then remove them. They are all 15mm bolts. Behind the tensioner there is another 15mm bolt that has to be removed.
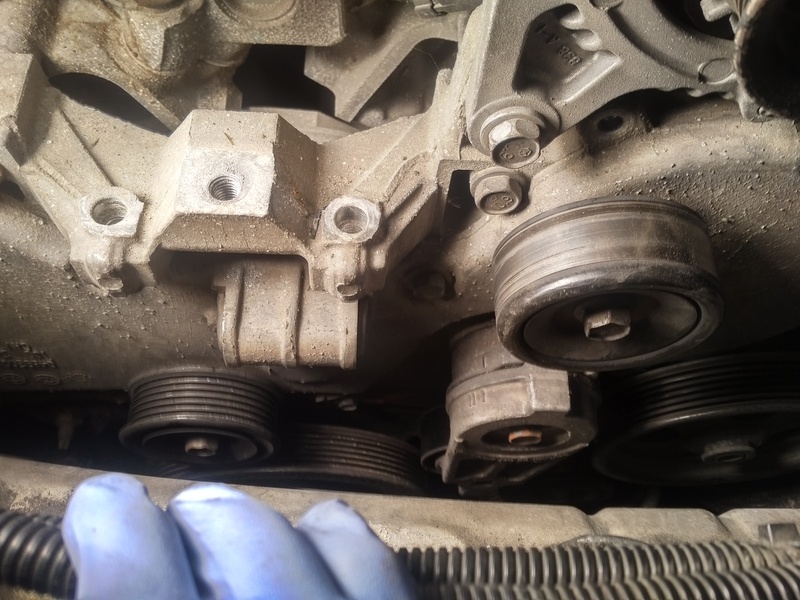
9) With a 1/2 short socket you have to rotate the pwr steering pulley until you see 3 bolts holding it on thru the circle holes in the pulley. There you will find another 10mm bolt securing the timing cover on. On the left side of the timing cover you will see two 15mm nuts that also has to be removed.
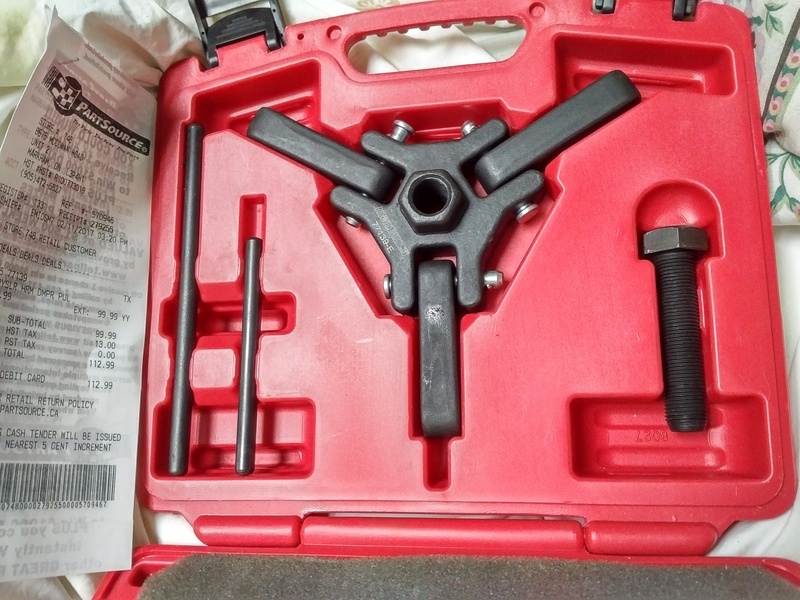
10) With a 18mm socket on a impact drive, Zip off the harmonic bolt. then with the proper puller remove it. (it must have a extension that goes inside the harmonic, not your traditional 3 prong puller)
11) take off the 10mm bolts securing the lower portion of the timing cover and remove it.
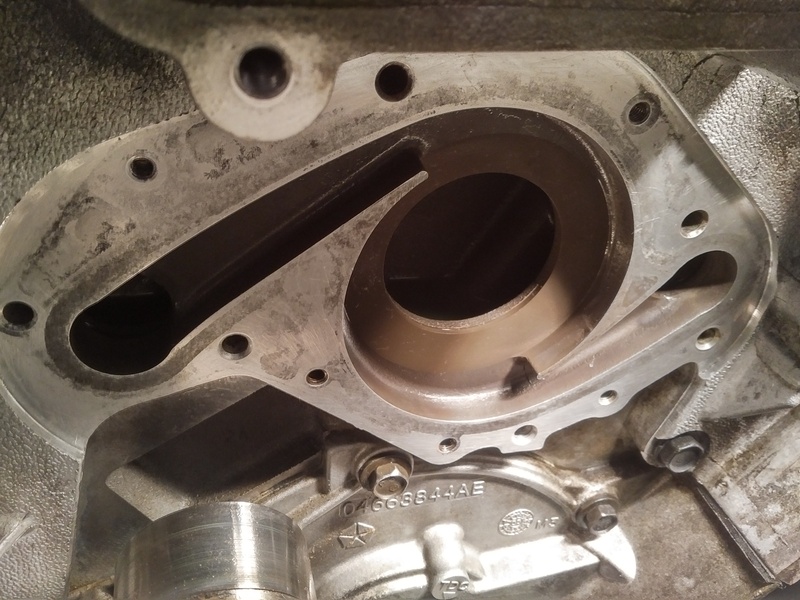
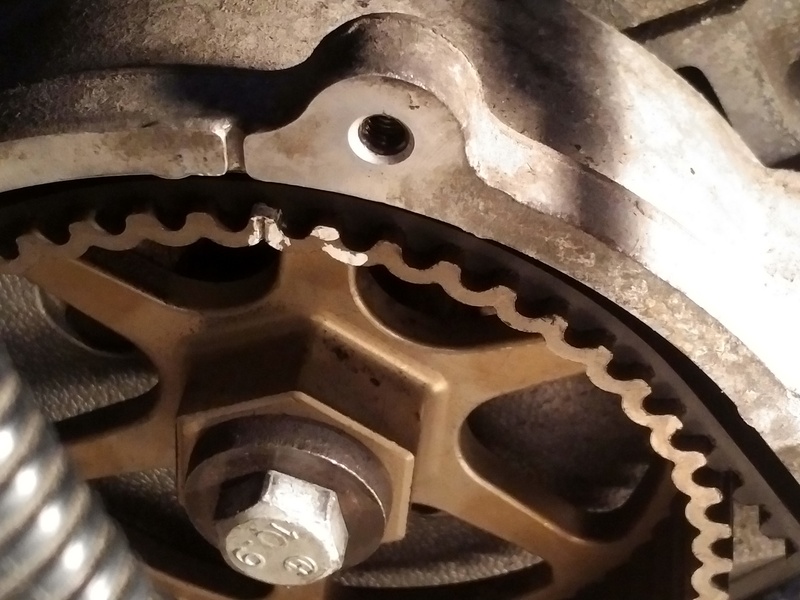
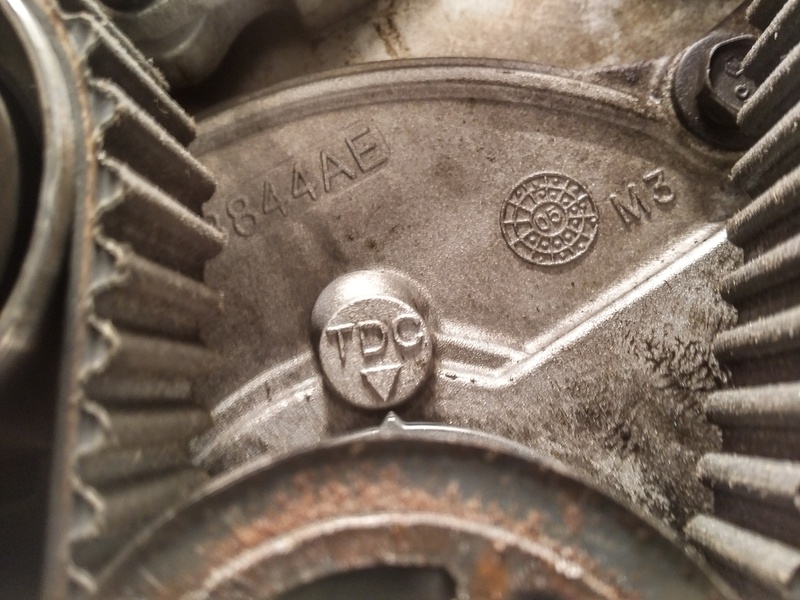
12) Put the 18mm bolt back in the crank shaft that was used to secure the harmonic balancer and rotate the motor so the cam spockets are facing up with the corresponding notches in the top of the timing cover housing, and the arrows both line up on the crank shaft cog pulley and timing cover housing.
13) With a 1/2 socket go thru the wheel well and take off the tensioner for the timing belt. Some people do the liquid paper thing to match the belts with it before removing the timing belt. I didn't. I do that belt once I put the new one on.
14) With a 10mm socket, remove all bolts on the water pump and remove it.
15) Clean the surface properly with a exacto blade and use a scotch bright pad to clean it afterwards. I like to use brake cleaner on a rag for the final clean before putting on the new water pump.
16) Install the new water pump. No need for silcone when the pump comes with a rubber oring.
17) Now the liquid paper comes out and I mark the notch in the cam spockets and belt.What worked well for me was to put on the new belt and take the slack out from the crank shaft pulley to the right side timing sprocket. So when the tensioner is tightened later, that part doesn't move. Get the new tensioner, loosely install it so there is now tension on the belt. Put the belt on the left side cam sprocket, but take the notch and rotate it 2 cog belt notches forward so the 2 lines don't meet up. Then tighten the tensioner and it will rotate that sprocket back to line up the marks.
Once that is done start putting Humpty Dumpty back together again by following everything in the reverse, then add new coolant and fire it up.
Step one, disconnect the battery
2) take the plastic 3.5 lid off of the engine
3) take a screw driver and loosen the hose clamp by the throttle body, disconnect the sensor on the air intake rubber hose, and take a 10mm socket and loosen the bolt on the rad support that holds the air filter canister. Once that is done, wiggle the entire air intake system off of the car.
4) jack up the car, support the car with a proper jack stand on the sub frame behind the wheel so you can get under the car later. Remove the plastic inner fender near the front of the wheel well that covers the Ac compressor. There are 2 plugs in the wheel wel, one on the lower frame under the rad, and two are in the inside frame of the engine compartment.
5) drain the rad. I took off the lower rad hose because I was replacing it anyway.
6) Now that the car is in the air, get a floor jack with something solid and flat to support the oil pan
7 ) With a 15mm socket, take off the 3 bolts on the motor mount that's attached to the motor, then the 2 15mm bolts for the mount that is on the frame of the car.
8) Take off the serpentine belt by putting a 3/8 drive into the tensioner and pull it back and remove the belt. Time to take the bolts off of the timing cover. Which I first took off all the 10mm bolts that I could see (2 at the top, 2 at the rear side near the fire wall), then with a 1/2" socket, remove the 2 at the top of the cover. Take a picture of the pullies on the engine so you know how they go back on. Then remove them. They are all 15mm bolts. Behind the tensioner there is another 15mm bolt that has to be removed.

9) With a 1/2 short socket you have to rotate the pwr steering pulley until you see 3 bolts holding it on thru the circle holes in the pulley. There you will find another 10mm bolt securing the timing cover on. On the left side of the timing cover you will see two 15mm nuts that also has to be removed.
10) With a 18mm socket on a impact drive, Zip off the harmonic bolt. then with the proper puller remove it. (it must have a extension that goes inside the harmonic, not your traditional 3 prong puller)

11) take off the 10mm bolts securing the lower portion of the timing cover and remove it.
12) Put the 18mm bolt back in the crank shaft that was used to secure the harmonic balancer and rotate the motor so the cam spockets are facing up with the corresponding notches in the top of the timing cover housing, and the arrows both line up on the crank shaft cog pulley and timing cover housing.
13) With a 1/2 socket go thru the wheel well and take off the tensioner for the timing belt. Some people do the liquid paper thing to match the belts with it before removing the timing belt. I didn't. I do that belt once I put the new one on.
14) With a 10mm socket, remove all bolts on the water pump and remove it.
15) Clean the surface properly with a exacto blade and use a scotch bright pad to clean it afterwards. I like to use brake cleaner on a rag for the final clean before putting on the new water pump.

16) Install the new water pump. No need for silcone when the pump comes with a rubber oring.

17) Now the liquid paper comes out and I mark the notch in the cam spockets and belt.What worked well for me was to put on the new belt and take the slack out from the crank shaft pulley to the right side timing sprocket. So when the tensioner is tightened later, that part doesn't move. Get the new tensioner, loosely install it so there is now tension on the belt. Put the belt on the left side cam sprocket, but take the notch and rotate it 2 cog belt notches forward so the 2 lines don't meet up. Then tighten the tensioner and it will rotate that sprocket back to line up the marks.


Once that is done start putting Humpty Dumpty back together again by following everything in the reverse, then add new coolant and fire it up.


Thread
Thread Starter
Forum
Replies
Last Post
tn_voldad13
Chrysler Pacifica
4
Apr 22, 2018 08:59 AM