
Headrest monitors


Thread Starter
|
Member
Joined: Nov 2009
Posts: 80
ok, back to reality ")
As I was waiting for the electronics store to open today, I decided to try the SEM Classic Coat on the vinyl armrests that had dye transfer from (I assume) the previous owner's red leather coat.
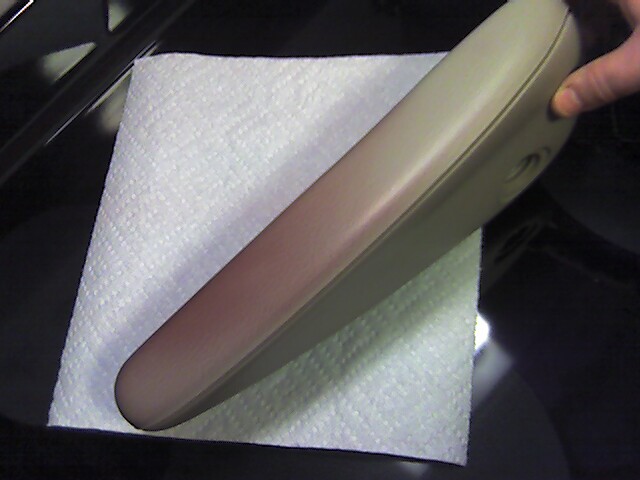
Not pretty. That was the only thing my wife complained about when we got the Pacifica (aside from the lack of heated seats of course) So seeing how well it worked on the headrests, I figured I should try it. Result?
Like new!!!
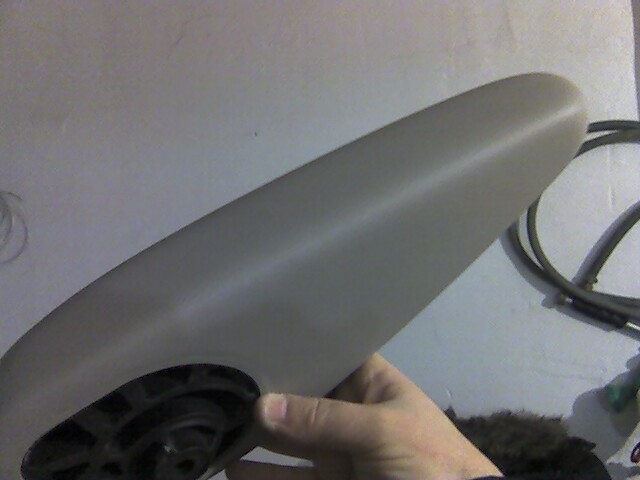
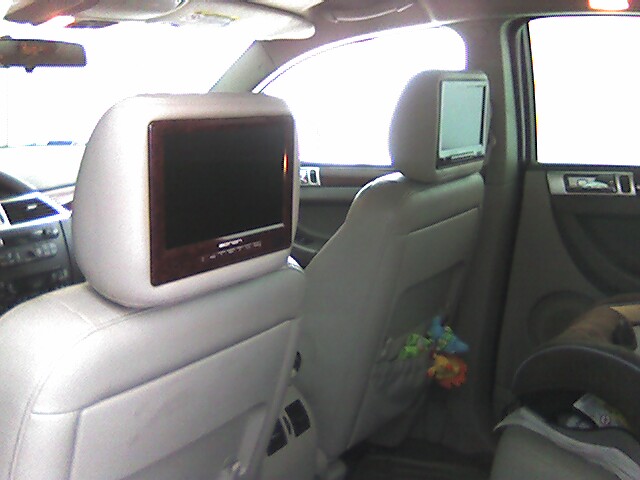
So I put in the passenger's monitor; same technique as previous:
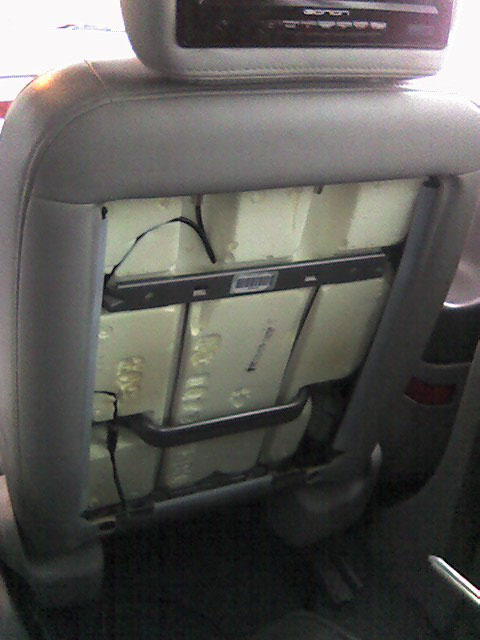
for those interested, here is the back panel. to remove it, you need to pop the sides gently close to the restraint pins, then pull out the top, and finally, lift the back out. Always use a dull plastic tool, so you don't damage anything.
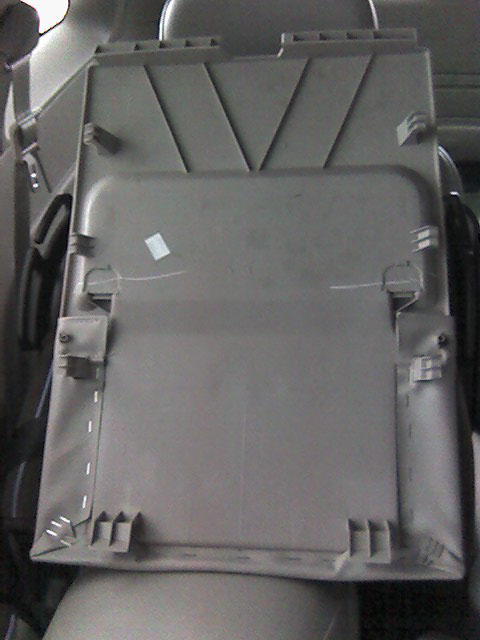
To put it back: bottom first, then top, then push in the sides until they snap.
And voila!
The connection wires are passed into the center console from under the seats. I plan on fixing that part today, so more to come tonight.
As I was waiting for the electronics store to open today, I decided to try the SEM Classic Coat on the vinyl armrests that had dye transfer from (I assume) the previous owner's red leather coat.
Not pretty. That was the only thing my wife complained about when we got the Pacifica (aside from the lack of heated seats of course) So seeing how well it worked on the headrests, I figured I should try it. Result?
Like new!!!
So I put in the passenger's monitor; same technique as previous:
for those interested, here is the back panel. to remove it, you need to pop the sides gently close to the restraint pins, then pull out the top, and finally, lift the back out. Always use a dull plastic tool, so you don't damage anything.
To put it back: bottom first, then top, then push in the sides until they snap.
And voila!
The connection wires are passed into the center console from under the seats. I plan on fixing that part today, so more to come tonight.

Junior Member
Joined: Jan 2010
Posts: 1
Hello All,
I am completely new to PAC and American Cars in general. My last autos were hand-me-down's so after college, military and a civil service job and more college, I have decided to treat my self to a Chrysler Pacifica.
I wanted to know the answer to some questions; if you have the time to answer. The model I have is the Touring, leather, heated seats, DVD/NAV 3rd row seat etc.
1. If you wanted to install 4 Headrest DVD monitors could you use 'add a circut' to tap into the fuse box radio fuse?
2. Would it be 1 DVD power wire per fuse or could you connect all four to the same fuse?
Thanks in Advance
Thread Starter
|
Member
Joined: Nov 2009
Posts: 80
both my monitors have 2A fuses on them, so I know they only draw max total 4A. I figured the small distribution amp is about the same. That gives me 6 amps (maybe 8), so I tapped directly into the backseat electric outlet (keyed cigarette lighter) supply.
These outlets are usually 10-20A fused, most likely 15A. I would have to double-check the fusebox, but I figure that if everything is on, I'll be using 6 to 8 amps.
As long as I don't plug a blender in the back I should be ok.
The fatory-installed dvd player has some pins on the connector listed as BATT IGN and BATT GND. You could use those to power 2 monitors, and the outlet to power the rest. There are a lot of options.
Just make sure you tap "keyed" or "accessory" power. (the power outlets with a key on them) Those only work when the key is turned/car is running, so you won't drain the battery.
I used these to tap into the lines. they work great and are self-insulated.
All-in-all, you have to see how much power you are drawing.
Last edited by desperado; Jan 6, 2010 at 08:44 AM.
Thread Starter
|
Member
Joined: Nov 2009
Posts: 80
Finally got the chrysler repair kit, and went to work on the last piece of the puzzle.
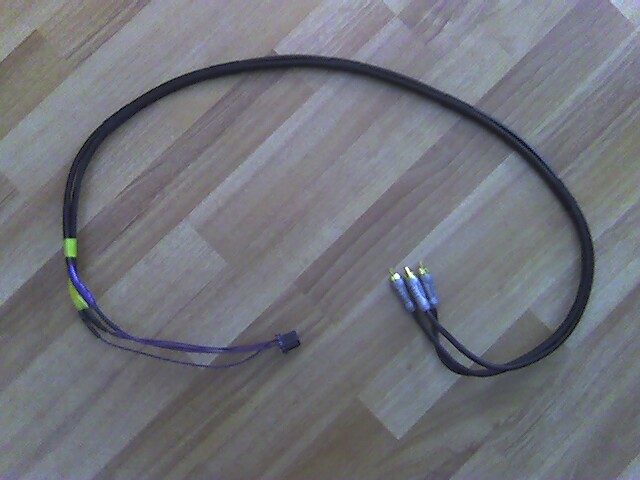
Not elegant, but effective. I used a monster A/V cable as it's top quality and nicely insulated. ok, I probably should have shorter leads out of the connector to help with shielding, but it works great none the less. Plugged it all in, fished all the wires into the console, and:
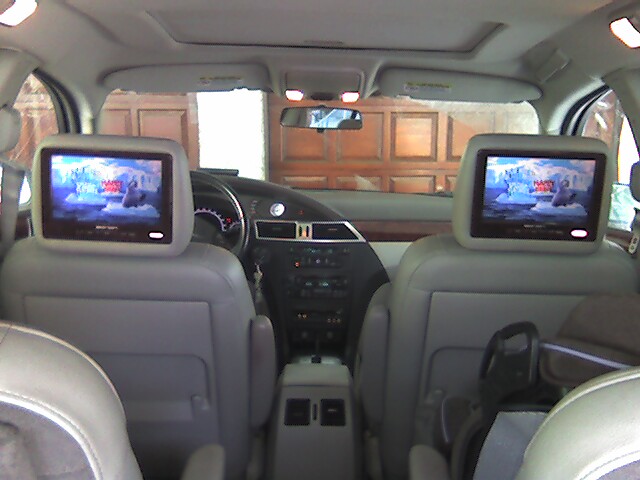
Voila! Also got the remote, so it's all good!
Thanks mrfixit for all your help and input. It's been a great experience and I hope it helps someone. If anyone has questions, please shoot.
Sorry the pictures are crappy, but they were all taken with a phone.
Not elegant, but effective. I used a monster A/V cable as it's top quality and nicely insulated. ok, I probably should have shorter leads out of the connector to help with shielding, but it works great none the less. Plugged it all in, fished all the wires into the console, and:
Voila! Also got the remote, so it's all good!
Thanks mrfixit for all your help and input. It's been a great experience and I hope it helps someone. If anyone has questions, please shoot.
Sorry the pictures are crappy, but they were all taken with a phone.

Senior Member
Joined: Jan 2007
Posts: 531
Desperado,
That is so cool you got it all working. It has been great following along with you. Those darn repair connectors do cost but they sure do work.
Did I miss how you routed the wires up front? Did you remove any of the center console?
Excellent write up.
Fixit
That is so cool you got it all working. It has been great following along with you. Those darn repair connectors do cost but they sure do work.
Did I miss how you routed the wires up front? Did you remove any of the center console?
Excellent write up.
Fixit
Thread Starter
|
Member
Joined: Nov 2009
Posts: 80
the final wiring didn't photograph very well as most of it is stuffed inside the hollow parts of the console. I had to repeat what I did in post #4, plus I had to remove the top of the center console (cupholders+trim around the opening).
Here is a simplified version of the wiring:

I passed behind the front dash power outlets towards the driver's side (to leave space for the coin tray), them passed along the transmission and split the audio and video into both sides of the console.
The "M" shaped piece of white plastic in the middle is where the cupholders bolt down, so I had to pass underneath.
I then had to jam any extra wiring where I could. There is some space in front of the transmission, so the extra length of my homemade harness was put there. there is a hollow space where the door of the cupholder opens up. The rest of the loose in cables is there. Any other lengths of cables were jammed into the sides of the console.
Here is a simplified version of the wiring:
I passed behind the front dash power outlets towards the driver's side (to leave space for the coin tray), them passed along the transmission and split the audio and video into both sides of the console.
The "M" shaped piece of white plastic in the middle is where the cupholders bolt down, so I had to pass underneath.
I then had to jam any extra wiring where I could. There is some space in front of the transmission, so the extra length of my homemade harness was put there. there is a hollow space where the door of the cupholder opens up. The rest of the loose in cables is there. Any other lengths of cables were jammed into the sides of the console.

Thread Starter
|
Member
Joined: Nov 2009
Posts: 80
9" Headrest Kit+shipping 215$
DHL import fees 18$
SEM Classic Coat + SEM soap 34$
Chrysler Connector Repair kit 52$ (!)
Monster Cable 15$
Audio Splitters 16$
Video Connectors 2$
Pocket Multimeter 8$
Chrysler VES remote+shipping 26$ (ebay, new; I got lucky)
________________________________
TOTAL: 386$ CAD (360-375$ US depending on the exchange)
This is compared to:
Chrysler OEM (Mopar) 7" flip-down roof-mounted monitor:
1075$ + 225$ installation (as quoted by dealer)
1300$
or
Visualogic 7" headrest monitors OEM color matched:
899$ @ Crutchfield
+remote+repair kit+harness (93$)
+intl shipping (50?)
1050$
Last edited by desperado; Jan 11, 2010 at 08:38 AM. Reason: I can't type, what can I tell ya....

Thread Starter
|
Member
Joined: Nov 2009
Posts: 80
If you live anywhere cold, take note: both headsets died when I turned them on the day after it went down to -28�C (around -20�F). I assume it was a combination of frost and humidity that fried one of the PCB components, but I couldn't find anything specific by taking them apart.
I have since bought new ones and just dropped them in place. They are Identical except they have a zipper cover, which makes it a bit more complicated to paint.
Let me know if you have any questions and good luck!
I have since bought new ones and just dropped them in place. They are Identical except they have a zipper cover, which makes it a bit more complicated to paint.
Let me know if you have any questions and good luck!